Showing posts with label craft. Show all posts

Friday, October 28, 2016

2016-10-28: Cheshire Cat Vest

The completed project

There's a great thrift store near my house- Texas Thrift.  It's on Fondren just south of South Braeswood on the west side of the street.  The items are tagged with different colors, depending on when they were received.  Each Monday one of the tag colors is selected to sell for only $.99.

There is always good stuff to be had there.  I Last week I found 6 shirts nice shirts for Bert at $.99 apiece.  On another Monday I found this gray Disney t-shirt with the Cheshire Cat.  It was too small for me but I loved the cat.

Before
Cutting out the good parts
 After washing the t-shirt I carefully cut out the cat and most of the spooky-looking tree.


I then appliqued the cut-out to the back of a raspberry-colored hooded vest.  The entire cutout was outlined in black so I only needed to use black thread in a zigzag stitch to apply the cat to the vest.

I'm very happy with the result.  Plus I already own a cheshire cat hoodie hat with matching mittens and a cheshire cat fanny pack with a tail.  I'm ready for the cooler weather plus the ensemble would make a great Halloween outfit, too.

After


Tuesday, October 25, 2016

October 25, 2016: A More Complicated Upcycling Project


Finished front
Finished Back


I bought an interesting Ralph Lauren man's shirt at a thrift store.  I liked it because it combined plaid with southwestern motifs.  Unfortunately, it didn't close around me, so I had to enlarge it besides restyling it.

I cut out a 3" strip from the middle back of the shirt (about 3/4 of the way) and inserted an 8" piece of black fabric with embroidery on it in complementary colors.  After I tried the shirt on again I thought that the addition looked too jarring.  It needed to mesh with the rest of the shirt more.  So I appliqued the pieces that I had removed back onto the fabric insertion.
restyling the back of the shirt
 I didn't cut the shirt all the way to the collar because the shoulders fit fine and it would be too much trouble to redo the shirt collar.  That left a space that needed to be filled.  I covered it with a piece of black lace from my stash.

Of course, then the front needed something more.  I added more black lace above the pockets.


Before - front
Before - back
When I first started restyling clothing I enlarged tops by adding fabric to the side seams.  I've found that it works better to simply add to the garment back.  That preserves any darts besides being an easier, better looking solution.

Saturday, October 1, 2016

October 1, 2016: My Poodle Shirt Refashion

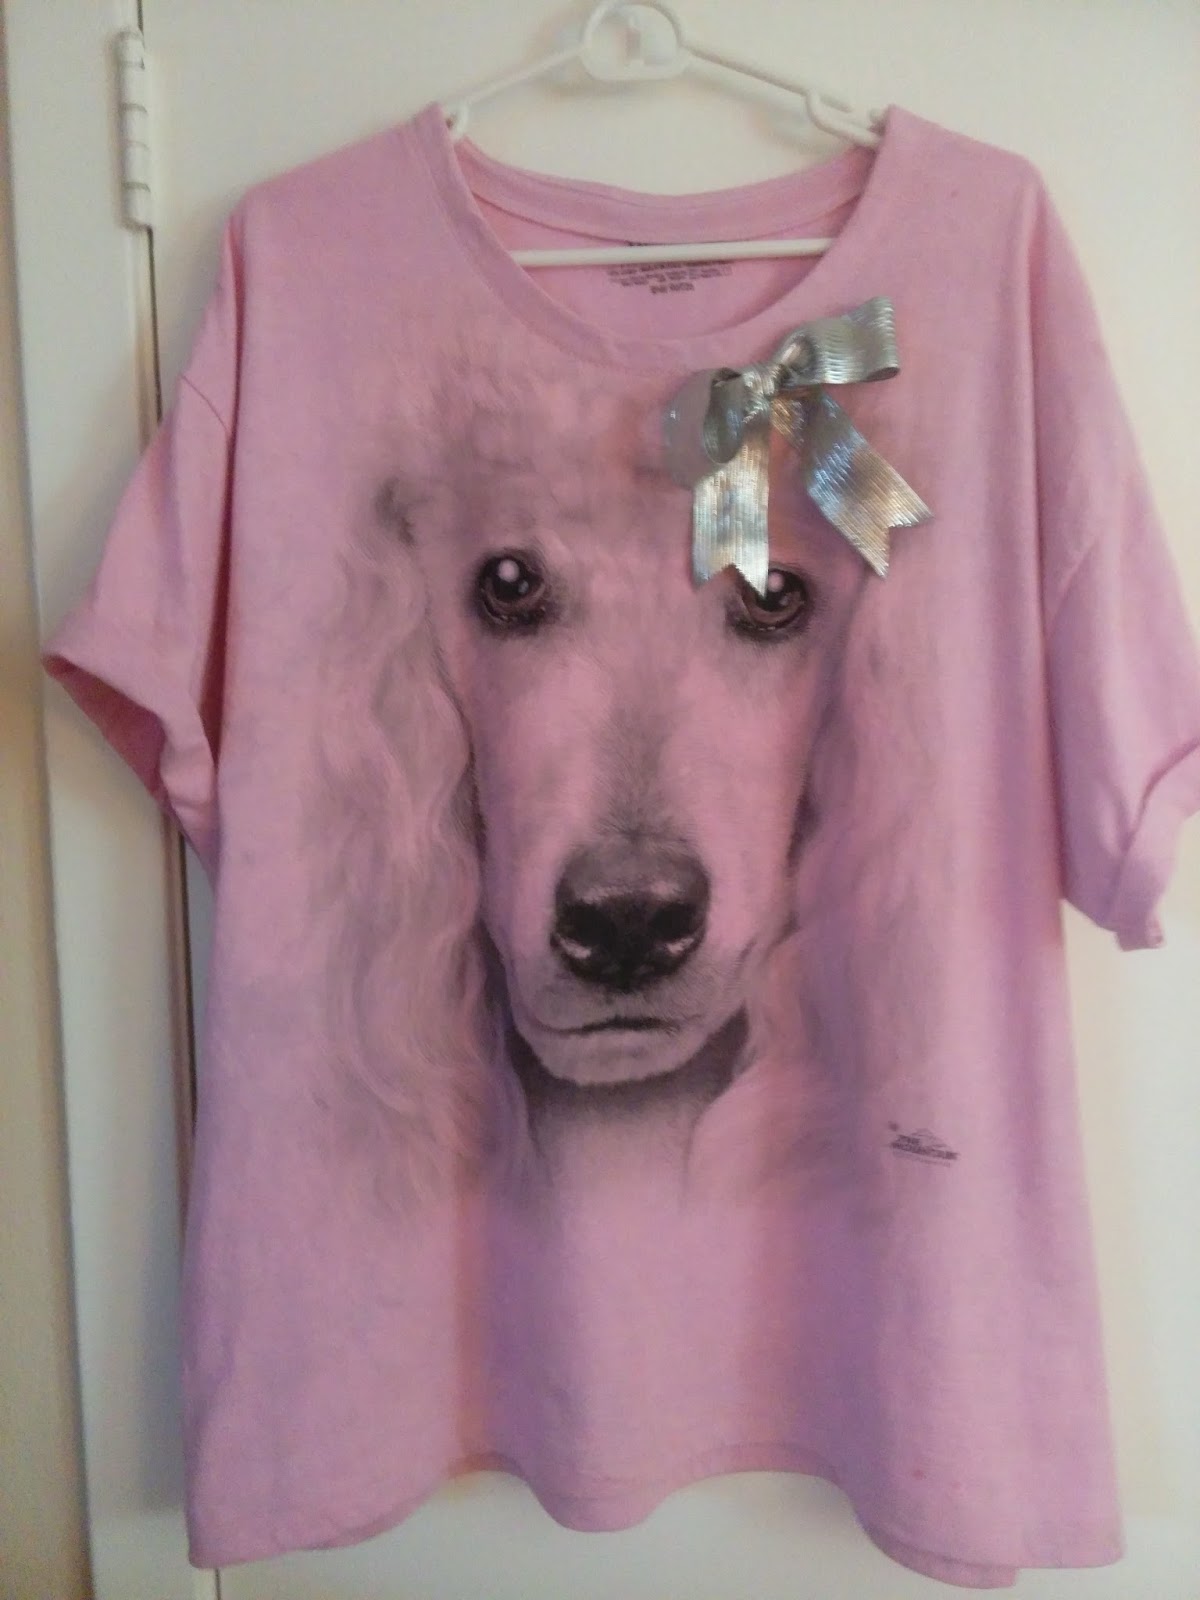
I bought a t-shirt from The Mountain that had big poodle face on it.  The shirt was light gray.
After
I lowered the neckline and shortened the t-shirt.  Then I dyed it pink and added a big silver bow.

Now I have a shirt that looks like my little Sweetsie-poo! 

 I think my grandkids will enjoy looking at their Grandma wearing this silly shirt.


Sweetsie and me


Thursday, September 29, 2016

September 29, 2016: Refashioning

Before - short tight dress
On September 10 I led my sewing group to a couple of thrift stores.  We went to fulfill a group challenge.  Each member was to buy a piece of clothing at a thrift store and then refashion (upcycle) it into another piece of clothing.

I remade several tops last weekend but I'll just show you one a day.

This first one was the simplest.  I bought an size XL sweater dress that actually fit me on top but was too tight and too short for the rest of me.


I cut off the bottom of the dress where it started narrowing.  I tried adding
lace to the bottom edge but my lace wasn't stretchy so it just didn't work.

I didn't really need to finish the hem since it was a knit and wouldn't ravel.  I just did some stitching at the side seams so they wouldn't come apart.  Then I used the bottom of the dress that I had cut off as an infinity scarf.
I think it came out cute.  Unfortunately the best photo of me wearing it is red-toned but you can get the idea.
After- hem is visible


Thursday, July 12, 2012

July 12, 2012: Little Doll Chatelaine

Finally, I am writing my tutorial on how to make my Little Doll Chatelaine.  Making dolls cheers me up and sometimes I get carried away.  I wanted my dolls to be more than decorative so that they would make good gifts.  I decided to have them function as chatelaines.  A sewing chatelaine is like a handy sewing kit worn around the neck.
First,  I draw out a simple doll shape, about 3" high and 2" wide. 

I cut 2 doll bodies from some scraps of upholstery fabric, a face from a circle of felt.


I use simple running stitches to embroider the face onto the doll. I use a variety of things for the hair - beads, yarn, lace - whatever I have at hand. Here I am using some hot pink rope that I got at a dollar store.


I couch the "hair" around the face of the doll and give her a cute hairdo.  The eyes are little black seed beads.  Eyelashes and a smile may be embroidered on later.

I add strips from fabric remnants for clothes - skirt, apron, top, just tacking them down with running stitches.
Now I sew the back to the front of the doll.


I add beads for hands and feet.

I like my dolls to carry something - a basket, handbag.  These I also fashion from bits of fabric scraps and beads.  I've added a ribbon rose to this one and put a small spool of thread inside.
I cut a small square of wool and encase it in some coordinating fabric.  This is creates the pincushion which I attach to the end of a length of grosgrain ribbon (usually around 30.").  I add some pins and needles.

I attach the other end of the ribbon to the back of the doll.  I add a horizontal strip of ribbon or fabric to hold a small pair of scissors.  Then I add my label.
 The ribbon is then draped around the wearer's neck and voila:  
A handy dandy sewing kit!

 Here is a photo of some of my other little dolls.  The smaller dolls are worn as pins.


Tuesday, February 16, 2010

Scrappy Flower Pins


Inspiration for my pins came from several venues. I love recycling projects. These pins provide me with ways to use up scraps of fabrics, orphaned earrings and buttons while playing with colors and textures. I carry the makings in a big box so I can craft the pins while I spend time with my Mom watching the boob tube.

SCRAPPY FLOWER TUTORIAL


My scrappy flower pins are a great way to use up bits of leftover fabric and orphaned earrings and buttons.
The pins have 2 to 5 layers. I love to mix different textures and colors of fabric. They are like potato chips - you can't have just one!

My tutorial shows how this particular pink scrappy pin is made. I used 3 fabrics - tulle, open weave cotton and a regular cotton. Cut the strips according to the following measurements. I used a rotary cutter for the tulle. I just tore the cottons. I like the fraying that I get this way. The loose threads lend an organic look to the finished pin.


This is how I cut the strips:

Strip 1 - approx. 1 1/4" wide by 18" long

Strip 2 - approx. 1 3/4" wide by 13" long
Strip 3 - approx. 2 1/4 " wide by 22" long

The gathered strips turn into the pictured rosettes.


Sew a running stitch on each strip along one long side. Pull up to gather. Meet ends and sew together. Be sure the gathers are arranged evenly.


Sew (or could glue) the circles on top of each other - biggest to smallest.


Select a center for the flower - orphaned earring or button, pin, pendant, etc.


Attach the center piece through all layers of the flower. Buttons are the easiest to sew on. I also sew on earrings or pins, often I will remove their backing to have the item lie flatter.
You could also simply glue the center.


I chose a pink yo yo from my stash.

Sew (or glue) the yo yo to the back of the flower to cover the stitches and to help support the petals.

Thursday, October 30, 2008

Maker Faire


I went to the Maker Faire in Austin 9/18/08. It's a gathering put on by MAKE and CRAFT magazines.

It's hard to describe. There are robot makers, food makers, art cars, art bicycles, a clothing swap meet, vendors, instructors, etc. The demos for sewing arts were pretty lame - like how a serger is different from a sewing machine.

I went into one building to sit down in air-conditioned comfort. 3 women of different ages strolled by sporting purple hair. I wish I had known that it was a dress-up event. I could have worn my pink poodle costume.

I attended the little fashion show at the end of the day. How can I put it? It was different. Mostly the items were re-made from thrift store purchases. Some were put together at the swap meet. I will upload the photos that I took.

The faire was a bit un-organized. The site map was incorrect. It was difficult to determine when the various programs would take place. Forget about trying to get something to eat and then find a shady spot in which to consume it.

Overall, I had a great time. I was with kindred spirits who were sharing their work and knowledge. My husband even enjoyed it. He spent a long time talking to an artist who works in styrofoam and concrete.